Chocolate Easter Bunny
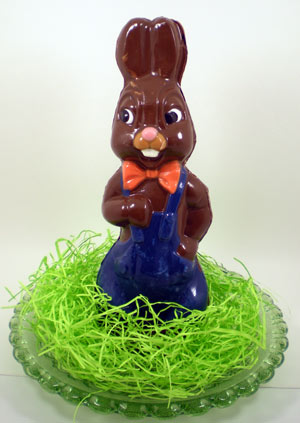
Make a Chocolate Easter Bunny for an eye catching addition to any Easter basket!
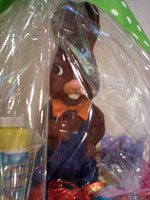
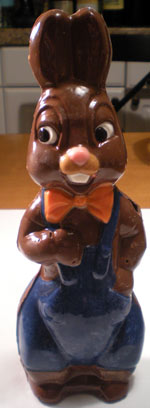
I have always had my heart set on making a chocolate Easter Bunny, so I set out on a mission to make a special colorful bunny, different from those that you can buy at the store. There were a few hiccups, but all in all I think that this Chocolate Easter bunny is an unforgettable addition to any Easter basket, and will surely bring a smile and Easter cheer to anyone who sees it.
I would caution that this project is challenging, and while I encourage everyone to try it, if you have not used a two part mold before, or worked with chocolate before, I would not recommend this as a first project. Begin with some simpler projects such as one piece molds using one or two colors of chocolate and then move on to this one!
To make this bunny, you will need the following tools –
~Two 12oz squeeze bottles
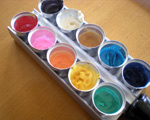
~Paint brushes of varying thicknesses
~Mold Clips (10) or Binder Clips
~Electric Skillet (optional)
You will also need the following Items –
~1 bag (16 oz) milk chocolate candy melts
~1 bag (16 oz) dark blue candy melts (for overalls)
~2 white melts for the eyes
~2 black melts for the eyes
~2 orange melts for bowtie
~2 red melts for pocket
~2 yellow melts for kerchief
~1 pink melt for nose
~1 tan or peanut butter melt for muzzle (you can mix brown and white to get this color as well)
Step 1 – Begin by plugging in the candy melter palette and dropping in all of the various colors you will be using. Let the palette melt the colors while you get the mold and filling colors ready.
Step 2 – Melt the filling colors. The main filling color is the milk chocolate. This is the color we will be filling the mold with and so we will want to melt this and have it ready for when we need it. Also since the overall color (dark blue) is the second most used color, you will want to have plenty of this color melted and ready for when you need it. I melt each bag of melts separately in a pyrex bowl in the microwave. To do this, I pour the entire 16 oz bag of melts into the bowl and microwave on defrost setting in increments of 30 seconds, stirring in between. Do this, stirring between each heat cycle, until the melts are completely smooth. Use a funnel to transfer the melted chocolate into a 12 oz squeeze bottle (all of the melted chocolate will fit). Do the same with the dark blue melts.
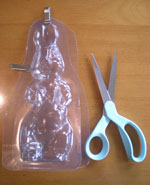
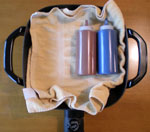
Step 3 – Keep the chocolate warm. To keep these colors warm and liquid while prepping and painting the mold, I place the bottles on top of a couple layers of dishtowels in an electric skillet on the lowest setting. Monitor this carefully, as you do not want the chocolate to get too warm. Rotate the bottles periodically and add additional towels to keep the proper temperature if necessary. Do not leave this unattended as it is a potential fire hazard.
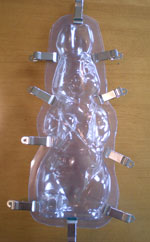
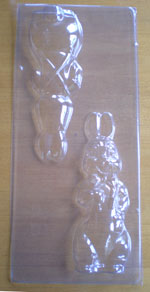
Step 4 – Now you are ready to prepare the mold. The mold that I have is not yet cut out. This is fine if you plan to make two halves and stick them together, but to make a 3-D mold you need to cut the mold out so that it can be clipped together. Roughly cut out the halves. Place the halves together and begin to cut through both layers of plastic leaving about 1/2″ border all the way around the mold. Once I get this started, I begin to use the mold clips to hold the cut portion of the mold together while I continue cutting around the entire mold.
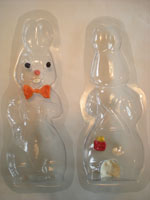
Step 5 – Separate the two sides of the mold and lay them flat on your work surface so that the interior of the mold faces you. Now you are ready to begin painting the details into the mold. Use toothpicks to stir the colors in your candy melter palette. Make sure that they are fully melted and smooth. There will be three stages of painting the chocolate.
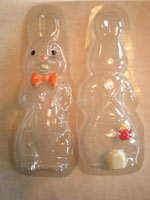
Chocolate Painting – Stage 1 – On the front interior of the bunny mold use your paintbrushes to paint black into the pupils of the eyes. Paint the pink nose, white teeth, and orange bowtie at this time as well. On the back interior of the bunny mold, use your paintbrush to paint the white tail, red pocket and yellow kerchief. You can use the same paintbrush by using a papertowel or cloth to wipe of the excess chocolate in between colors. Generally I designate one paintbrush per color so that there is no chance of the colors mixing. Whatever you do, do not wash the paintbrushes or get water anywhere near the chocolate work area. Water is the enemy of chocolate and will cause it to seize and become ruined. Use only dry or slightly damp towels or papertowels in the chocolate work area.
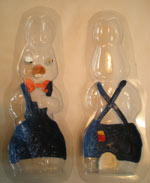
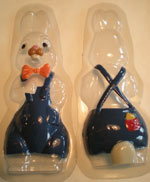
Chocolate Painting – Stage 2 – Make sure that your Stage 1 details are dry before beginning stage 2. Do this by touching the chocolate. It should be set, and should not stick to your finger. For Stage 2, paint the white iris of the eyes. Paint all the way around and over the black portion of the eyes so that there are no gaps. Paint the muzzle tan. Paint the overalls on both cavities of the mold using a paintbrush with a wider tip. Make sure that the dark blue overall color adheres to all of the surfaces. Hold the mold above your head to look at the exterior side of the mold to see if the coverage is consistent. Add a thick enough layer of blue so that it is solid and you cannot see through it when looking from the other side.
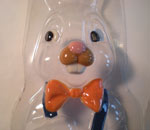
Chocolate Painting – Stage 3 – At this point make sure that all of your stage 2 details are set. If everything is set, proceed by using a wide tipped brush to paint the entire interior of both halves of the mold with a coat of the milk chocolate filling color. I do this as a precaution. In two sided molds, I have had the unfortunate experience of squeezing my warm filling color into a perfectly detailed mold and seeing my details melt and slide over out of place because the warmth of
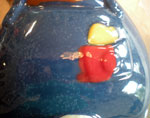
the filling chocolate caused them to detach from the surface that they were painted to. One solution to this is to use a cooler chocolate or refrain from rotating the mold. I find that if the chocolate is any cooler, it will not completely coat the mold as it should, and I have had sliding occur even when I am not rotating molds. At this point you have already invested a lot of time and effort into this bunny and I advise you to paint the insulating coat of milk chocolate to protect your details. If you have any tricks or solutions for this problem, please let me know.
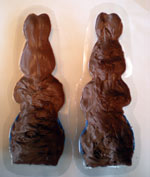
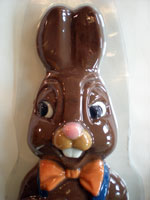
Step 6 – Make sure that the insulating coat of milk chocolate is set. Now you are ready to put the two halves together. To do this I use the milk chocolate filled squeeze bottle to fill the back interior of the mold with chocolate. Take the front of the mold and place it on top of the chocolate filled half. Clip the molds together using the chocolate clips. Rotate the entire mold to get the interior completely covered. Another option for filling this mold is to clip both halves together and fill the mold with chocolate through a hole in the bottom. This method requires you to make a hole in the bottom of the mold and make sure you have a container big enough to place the mold in vertically so that it stands upright while you fill it with chocolate.
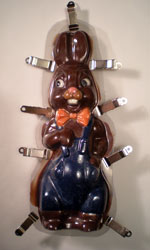
Step 7 – Refrigerate the mold until set. I refrigerated this mold for 30-40 minutes. Allowing it to set longer should not do any harm, and once it has set it should easily release from the mold. Just remove the clips and gently pry away the plastic.
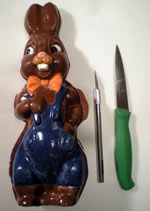
Step 8 – Don’t worry that there is an unsightly seam around the bunny. This is normal and can be easily removed using an exacto knife or paring knife (as long as these tools are sharp, they should work). Place the bunny on a piece of parchment or wax paper and use the exacto to remove the excess chocolate from the edges. Dust away any chocolate shavings that land on the bunny, and now you are left with a spectacular Easter treat!
