Tapatío Succulent Cake

Hello again! Finally back to blogging! Since I had my second son, things have gotten a bit hectic. Most of my time is spent trying to keep up with my two little ones and in the spare moments that I have, I bake. I have had the best of intentions to share my baking adventures with you, but time has slipped by. Hopefully in the coming months, I will get back into the swing of things. I just made this Tapatio Succulent cake for a friend’s surprise 40th birthday, and with Cinco de Mayo coming up, it seemed like the perfect time to share.

This cake was for a Mexican themed 40th birthday for our great friend, Brendan. A few weeks before the party I got a call from his wife and she told me that she wanted a Tapatio cake. Believe it or not, at the time, I had never even tried Tapatio, and it was completely off of my radar. I had been wanting to make a cake with edible succulents, and I thought with the Mexican theme, this would be the perfect opportunity. I just needed to come up with a design using both the bottle and the succulents.

I decided on a design using a terracotta pot full of succulents with the Tapatio bottle as the focal point.

Our friend’s wife also mentioned that she would like to have his face on the Tapatio bottle. Luckily my husband is a Photoshop wiz, so he customized the label with our friends likeness and added the 40 anos where the true Tapatio bottle reads Salsa Picante.

I had envisioned a short terracotta pot with white decorations on it, and I felt like this was a detail I really wanted to make happen. I ended up using Wilton white color dust mixed with vodka painted on the fondant to get this effect.

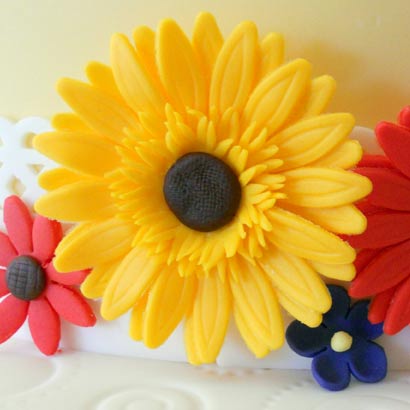
I really love the sweet yellow cactus flower. It’s just one of those tiny details that really livens up this cake.

I crushed about half of a bag of Oreo cookies (cream filling and all) in a food processor to create the “dirt”that fills the pot. I also crushed some Nilla wafers to create the light crumbs which remind me of Perlite and add a bit of highlighting to the planter.

I used Wilton flower forming cups as drying forms for all of the various gumpaste succulents.

I used Wilton purple color dust to accent the above dark green succulent.

Since the hen and chick succulent was my biggest plant, I needed to use a deeper container to hold it for drying. I ended up using a little custard dish, and put tiny pieces of paper towel between the leaves to keep them separated while drying. I started making the succulents for this cake about a week and a half in advance.

To create the Tapatio bottle, I struggled with quite a few attempts and failures. I finally landed on covering an actual Tapatio bottle in gumpaste and letting it dry overnight before removing it and filling with cake. To do this, I covered the bottle in plastic wrap and then sprayed it with non-stick spray so that the gumpaste would release easier. This method worked really well, but because there were two halves to the bottle, there were two seams. I filled in the seams with red crusting buttercream. To get the red color as close to the color of Tapatio as I could, I mixed Americolor super red and burgundy gel pastes.

This is the hollow bottle half. You can see that it is strong enough to support its own weight.

I filled the hollow gumpaste bottle with a similar bottle I made of cake. I used a biscuit cutter and some small round cutters to get the rough shape, and I used a knife to carve the tapered portion of the bottle. I could have filled the gumpaste bottle with rice krispy treats or even left it empty, but it’s just so fun to bite into a cake bottle, right?

The cake itself is tapered toward the bottom. I frosted it in chocolate ganache for maximum stability.

Here is the cake covered in terracotta colored fondant. To get the terracotta color, I originally mixed brown and orange, but I wasn’t happy with the color. I then tried Americolor copper and Americolor terracotta, but these weren’t quite right. I eventually ended up running out to the store to get Wilton copper gel paste. This really was the perfect color, and I needed to get it just right so it would be believable. The rim is made of gum paste that I rolled, cut and left out overnight. Leaving it out helped to stiffen it up a bit so that it was easier to place on the cake.

This cactus is actually a Twinkie covered in moss green buttercream. I used a pastry comb to get the tiny ridges.

There is one wooden dowel going through the cake and bottle to keep the bottle propped up on an angle. There is also one stick of dry spaghetti in the center of the Twinkie to keep it vertical. Other than those two items, there are no wires or supports of any kind in this cake. It is all edible.

I used a thin layer of gumpaste as the backing for the edible label so that red would not show through the edible image. I used an actual Tapatio label as a template to get the size just right.

Here are the edible frosting sheet labels. I ordered these from a local cake supply shop that has a food printer. They come on a letter sized sheet, so I had four just in case anything went wrong.

Here’s the birthday boy, right on the label. I used piping gel to attach the edible image to the gumpaste backer and to the cake.

Adding the Tapatio label and painting the designs on the pot were the finishing touches for this cake.

Working on such a realistic cake was a fun change for me. This would be a great cake for any Tapatio lover, Mexican themed party, or Cinco de Mayo celebration. I’m so happy that it turned out well, and Brendan ended up loving his surprise.